Ripped jeans have been around and well since the 70s, and even today, their popularity remains unbudging. And the best part is that there are a plethora of stylish variations when it comes to distressed jeans. But sometimes, they cost an arm and a leg. But this is where your crafty mind comes in. If you are someone who loves taking the DIY route every now and then, we bring you easy ways how to distress jeans easily at home.
What Are Ripped Jeans?
Distressed jeans or ripped jeans were a part of the grunge fashion movement and are designed to make you feel more relaxed and worn-in and feature tears, rips, fading indigo dye, tattered edges, and more. They give you an aura of a pair of stylish old jeans and are in trend even today.
Supplies You Will Need to distress the Jeans
If you are a fan of ripped jeans and have an old pair of jeans that you think will look perfect after giving them a ripped makeover, then these are the supplies you will need to distress your jeans;
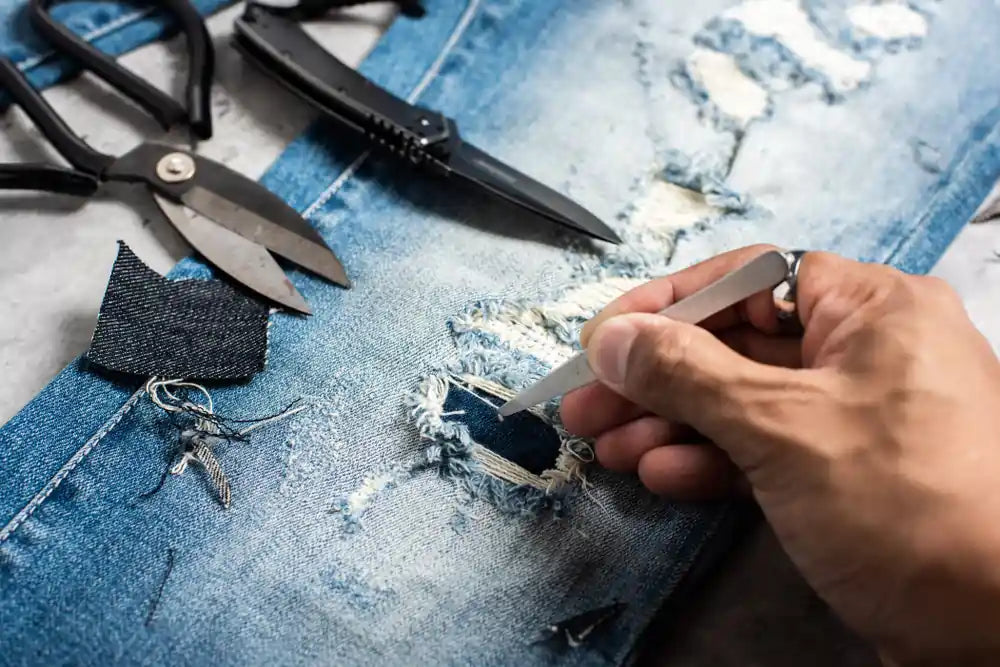
- Fabric scissors or utility cutter knife- For making holes, shreds, or cuts
- Tweezers- For removing threads
- Razor or Scissors- For scrape and frays
- A pumice stone or Sandpaper- For a distressed look. However, if you do not have either item at home, you can also use a cheese grater.
- Marker, Tailor’s chalk, or just a pen- You will need chalk or a pen if you mark the lines for any cuts. Here, chalk is the safest option because it will not stain.
-winterBanner-
11 Steps to make ripped jeans
Let’s look at how to distress jeans in just 11 simple steps without any further ado.
-
Select A Jeans Or Shorts
The first step to creating your ripped skinny jeans is selecting a pair of old ones. Ensure you choose something comfortable and old so that even if this DIY project goes south, you won’t miss that particular pair of jeans. You can also choose a good pair from thrift stores and more.
-
Pick a spot to rip and mark it with chalk
The next step on how to make your jeans ripped is to plan the design, depending on what you want. Browse through the internet to see which design gels well with that particular pair you own.
-
Spread out the jeans on a flat surface
Lay the jeans on a flat surface like a table to make it easier. Using the chalk, mark all the areas that you want to tear. If you are marking lines, it is always best to use a ruler so that the rips will be uniform on both sides. If you want to rip around the knees, ensure it is a little higher than the knee so the rip won’t become wider as you walk and sit.
-
Insert a magazine in it to protect the bottom layer
Before you start ripping or cutting the jeans, place a wooden block, old new papers, or magazines to ensure the bottom layer of the jeans doesn’t deteriorate.
-
Start fraying the jeans with sandpaper
Before cutting the jeans with scissors, fray them with sandpaper, a razor, or with a cheese grater to thin out the spot you want to rip. This will help loosen the fabric, and it will also give it a frayed look. The next step is to cut it. However, it can be slightly more time-consuming. If you don’t want a slightly distressed look around the cuts, you can go ahead and cut it.
-
Loosen the fibers to create holes
If you want the stringy patches to look, you can fray the jeans with a grater or sandpaper and then use scissors or a knife to tag the area and loosen the fibers so when you put the jeans on, a little skin will show.
-
Add holes with a knife or scissors.
You can add holes in the distressed areas to give it a more natural feel. Ensure the holes are not too wide. Do not go beyond half an inch.
-
Use your hands to rip the jeans even further.
Once all the holes and cuts have been made, use your hands to rip the fibers so they will look natural. You can also tug on the threads to ensure they look good. If you want it to look completely natural, you can just cut small holes and let the holes grow with every use.
-
Scrape Or Bleach Off
If you want to take the process to another level, you can scrape the jeans in a few other places and bleach them if you want a more vintage finish.
-
Fray The Edges & Pocket
If you first want to experiment slightly before giving your jeans a distressed makeover, you can stay with the pockets and the edges. Frayed pockets and edges give your jeans an exciting twist without too many cuts and rips. Use your razor or sandpaper to give your distressed jeans a frayed look.
-
Finishing Touches
Now that you are all done, just make sure everything looks good and add any finishing touches wherever necessary. Voila! Your baggy ripped jeans are ready.
What is the Best Way to Rip Jeans?
The best way how to make distressed jeans is to first have a plan in mind. Use a flat hard surface when doing it, and use chalk to mark the outlines. The next step is to use sandpaper, a razor, a cheese grater, or a pumice stone to give your jeans a frayed look. Ensure you go slow and have a minimalistic look since you are just learning how. Maybe you can fray your pockets or edges or rip the knee area. Once you feel more confident, you can move ahead and do more.
Distressing your jeans is an easy task when done right. Ensure you follow all the steps mentioned above to give your old pair of jeans a ripped makeover.
FAQs
How do you rip jeans without tweezers?
If you do not have tweezers, you can use razors or scissors to scrap or fray your jeans.
How to make ripped jeans with a razor?
Use disposable razors back and forth on the area of your jeans that you want to scrap and do it till it fetches you desirable results.
How to make ripped jeans with scissors?
You can use the scissors to cut or make holes in the jeans to give them a distressed look.
-relatedPosts-
SHOP STORE
